This project was born last summer when we went to the local consignment auction. At about 2:00 am they auctioned off a wire mesh cube shelf set that was in a box. No idea how many pieces were there or what we would do with it, but no one was bidding for a dollar…so we jumped in and bid. Seemed like we could find a use for it somewhere. Originally it probably looked like this:

Wire mesh shelving unit.
When we bought it, it looked like this:

Wire mesh cube shelf that we bought at auction last summer for a dollar. There were 25 pieces in the box.
Fast forward to last weekend. My father-in-law and I were talking about a trellis for the front yard vegetable garden. We like to have veggies in the front yard because our kitchen window overlooks it and it makes it really easy to pick side dishes to go with dinner. Just look outside and see what’s ripe. Last year we had three different trellises and it looked a bit junky. Given that this is our front yard, I wanted something that was sturdy, aesthetically pleasing, and cheap. Cheap being the word that makes me smile with glee.

Tiny little trellis from last year couldn’t keep up with our cucies. This is the wall we need to cover.
My father-in-law saw the shelving and we started hashing out a plan. The plan went from a stake-in-the-ground trellis to a hanging trellis. We perused the garage and found a piece of conduit about 8 feet long for the top bar that we could suspend under the eave.
It took my husband and me a few tries laying it out in a pattern that we liked. We were confined to the garage as stormy weather was on the way. I come from a family of quilters so I loved how the squares took on a geometric design, like a big quilted wall hanging. We also made sure the gaps were big enough we could reach between the squares to pick our produce.

Laying out the shelving pieces to get the pattern we wanted.
We decided to connect it with hog rings since they are cheap, sturdy, and we could probably find uses for the extras. We made a trip to the local farm and garden store for supplies.

Purchased supplies. Cost was 2.59 for the hog rings, and 1.29 each for the hooks. I bought three of them.
We gathered up tools:

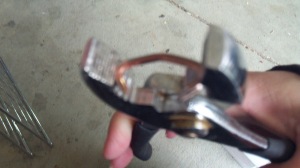
Tools for the project. Drill with drill bit slightly smaller than the hooks, tiny drill bit for metal screws at the end of the conduit. Pliers or hog pliers, wire cutters in case you need to remove one, screwdriver.
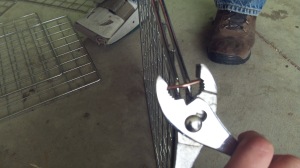
Hog ringing without the proper pliers is easiest as a two person job. I got the hog ring held in the pliers, then the gardening stud held the wires squares so I could fasten them. Real hog pliers have little dimples on the sides to hold the rounded ends. Our farm store sold them for about $14. We figured we could make do with regular pliers.
In the absence of hog ring pliers, we used regular pliers and put the hog ring in sideways.
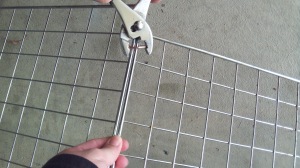
How we held the screens together to hog ring them.
The span of the pliers was too big for me to do one handed. Joe’s help holding the shelving saved me tons of frustration.

Hog ring in place. Makes a nice triangle.
We did 4 vertical rows point to point, and one set of horizontal squares between them. Then we decided it would be easiest to hang what we had so far, and hog ring the rest of the squares in place.
I drilled three holes into studs under the eave and screwed in our hooks. We had them alternate direction so there is no way it can come out of the hooks. We slid it in place from the end. We found 4 cheap carabiners in the kids rooms to use to hold the wire mesh on the conduit. Sorry, didn’t get a picture of that.
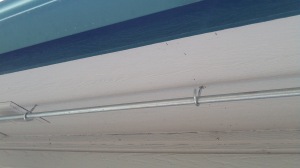
Conduit hanging under the eave.
We also drilled holes in the end of the conduit and put some metal screws in the end so the carabiners can’t slide off. Because we used a scrap piece of conduit, the carabiners are right at the edge of the conduit. If we had conduit a few inches longer than the span of the hanging trellis, we could have skipped this step.
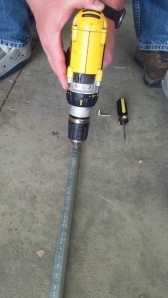
Drilling screws in the end of the conduit as a stop.
The finished project doesn’t quite touch the ground. Our plan is to use some temporary stakes when we put our plants in with string so they can climb to the first part of the trellis. This will also limit the amount of sway that the trellis might have in the wind. We don’t want our wee plants getting ripped out of the ground in a harsh wind.
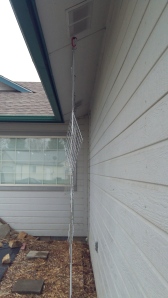
Side view to show how far it is from the wall.

Angle view so you can see the pattern. From the road it’s not very visible. It has gaps big enough for us to reach behind the mesh grid pieces and pick our produce. This view shows the diagonal grid pieces best
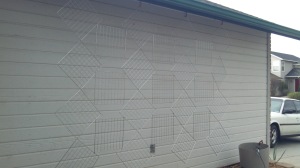
Another view, still hard to see against the grey wall. This angle shows the horizontal grids better. Impending storm didn’t allow for very good lighting.


 Then I found this one, where the crafter wasn’t concerned about the ridges in the cans, just decoupaged into them and I think it works wonderfully. See my progression…from sleek and stylized to homespun. Try as I might to be sophisticated, I always return back home.


